Home › Tech › IPhone
How to Enable a Disabled iPhone in iOS 17: Practical Solutions
Published on:
Your iPhone becomes inaccessible when it's disabled due to various reasons. One such reason is multiple incorrect password attempts, resulting in the device being locked. Facing this problem can be distressing, but there are solutions to resolve it.
In this guide, we'll walk you through three effective methods to enable a disabled iPhone on iOS 17. These solutions aim to help you overcome the challenges and restore your iPhone's functionality.
The Challenge of a Disabled iPhone
An iPhone that's disabled can halt your digital activities. Whether it occurs during an iOS 17 update or due to repeated incorrect passwords, the outcome is the same: a locked device causing frustration and helplessness.
Understanding what a "disabled iPhone in iOS 17" means and how to enable it is crucial. iPhones offer several security options like passcodes, facial recognition, and touch ID. However, when incorrect passcodes are repeatedly used, the device becomes disabled, necessitating a re-enablement process.
Methods to Enable Your iPhone
-
All-in-one Solution to Enable a Disabled iPhone without iTunes

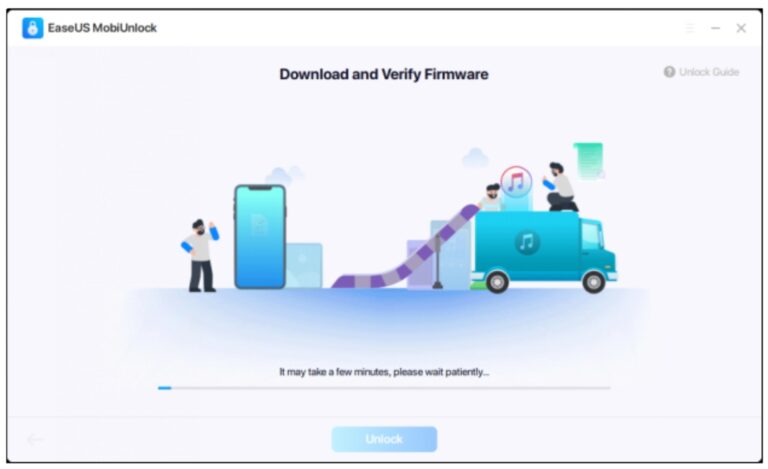
To enable a disabled iPhone effortlessly without iTunes, consider EaseUS MobiUnlock. This tool provides a one-click solution to bypass screen passcodes and restore functionality.
- Download and install EaseUS MobiUnlock on your PC.
- Connect your device to your PC and select "Unlock Screen Passcode" on the tool's homepage.
- Follow the on-screen instructions to enter "Recovery Mode."
- Download and verify the firmware as prompted.
- Initiate the unlocking process by selecting "Unlock" and entering the verification code.

-
Use iTunes to Restore a Disabled iPhone without a Passcode
iTunes, known for managing media, also offers the option to restore a disabled iPhone if a previous backup exists. However, restoring via iTunes without a backup results in data loss.
- Download and install iTunes on your PC, then connect your iPhone.
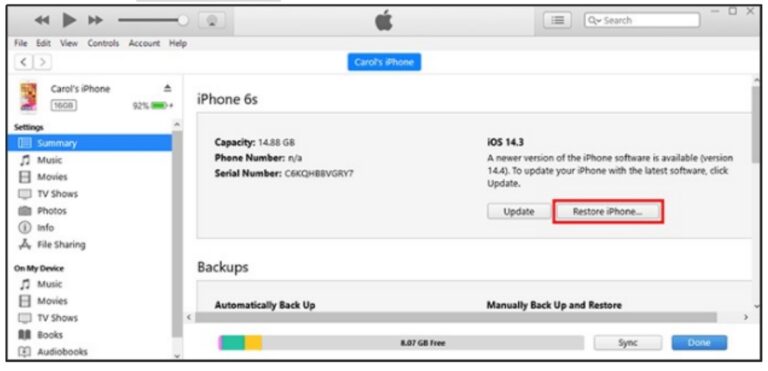
- In iTunes, click the device icon and navigate to "Summary" in the Sidebar.
- Initiate the restoration process by selecting "Restore iPhone."

-
Unlock Disabled iPhone in iOS 17/16 with iCloud
Using iCloud to unlock a disabled iPhone requires prior activation of the Find My iPhone feature. iCloud, Apple's cloud service, enables data synchronization and backup.
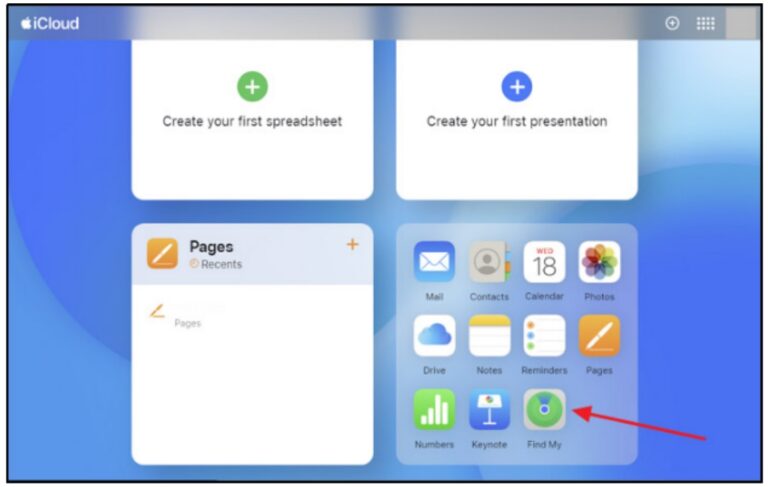
- Visit iCloud.com and log in to your account.
- Select the "Find My" icon and choose "All Devices" from the sidebar.
- Opt for "Erase iPhone" to delete all data and proceed with setting up the device.

Conclusion
Dealing with a disabled iPhone post iOS 17 update can be daunting. However, this guide presents three reliable methods to resolve the issue effectively. Whether it's using EaseUS MobiUnlock for a straightforward one-click solution, restoring via iTunes with prior backups, or leveraging iCloud's Find My iPhone feature, these methods offer practical solutions.
Each method caters to different user needs, ensuring a secure unlocking process. By following these steps, users can regain control over their disabled iPhones and restore functionality.
Share With Your Friends